Compound Leaves: Leaflets, Stems, and Lookalike Clues
Use visible clues and step-by-step comparison to evaluate compound leaves, spot common lookalikes, and decide what to check next before trusting one photo.
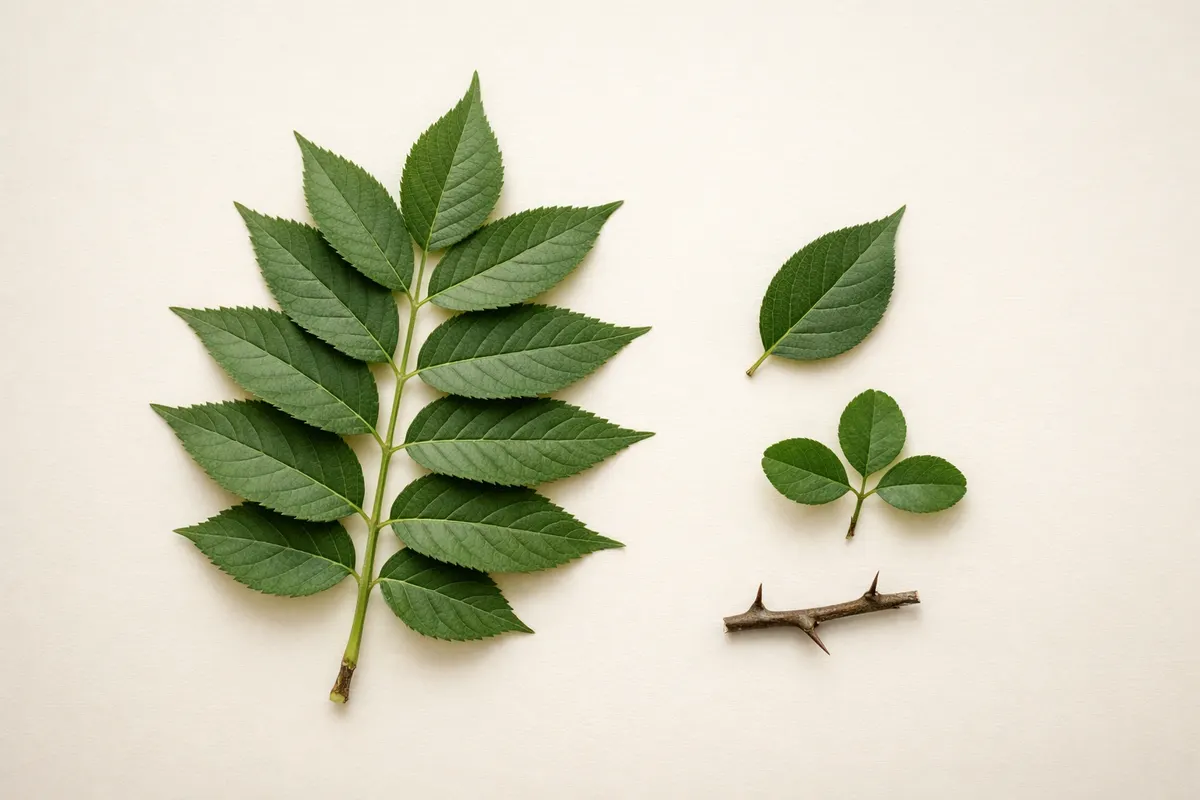
Quick answer for compound leaves
Compound leaves are leaves where a single leaf is divided into multiple leaflets attached to the same stem (rachis) rather than being a single undivided blade. The clearest photo clues you can use from a phone image are leaflet count and arrangement (pinnate vs. palmate), whether leaflets attach to a central stalk or radiate from one point, and the presence of a visible rachis or petiolule where each leaflet meets the stalk.
Those clues are useful because they survive common photo problems: lighting shifts, slight blur, and varied angles. For example, a palmately compound leaf like horse chestnut has 5–7 leaflets that radiate from one point; a pinnate leaf like ash or walnut shows leaflets arranged along a central stalk. Counting and mapping leaflet positions is usually stronger than relying on color, seasonal spotting, or sheen.
Be realistic: a single photo rarely produces a confident species ID. Compound leaves narrow possibilities quickly and help you compare likely matches, but you should treat any one photo-based match as a research note. Use the clues below to shortlist possibilities, then collect a few more photos or habitat clues before drawing a firm conclusion.
Strongest visual clues
When assessing compound leaves in photos, start with structural features that survive poor lighting and small amounts of blur. The most stable clues are leaflet number, arrangement, and how leaflets attach to the stalk. A reliable photograph will let you count leaflets, see whether they attach on a stalk (pinnate) or from one point (palmate), and detect a central rachis.
Next, examine leaflet shape and margin detail. Even if color is washed or shadowed, the outline—whether lanceolate, oval, obovate, or narrowly toothed—often remains visible. Margins (entire, serrate, lobed) are especially helpful when paired with leaflet arrangement: for example, pinnate leaves with regularly serrated margins point toward species groups like ash or walnut relatives, while large palmate leaflets with lobed margins suggest horse chestnut or catalpa-like plants.
Venation and the insertion point of the petiole can also hold up in phone photos. Strong photos show whether the main veins run parallel inside each leaflet, whether a prominent midrib continues into the rachis, and whether leaflets have short petiolules or sit directly on the rachis. These small attachment details separate lookalikes—two trees can appear similar until you notice that one has distinct petiolules and the other’s leaflets are sessile.
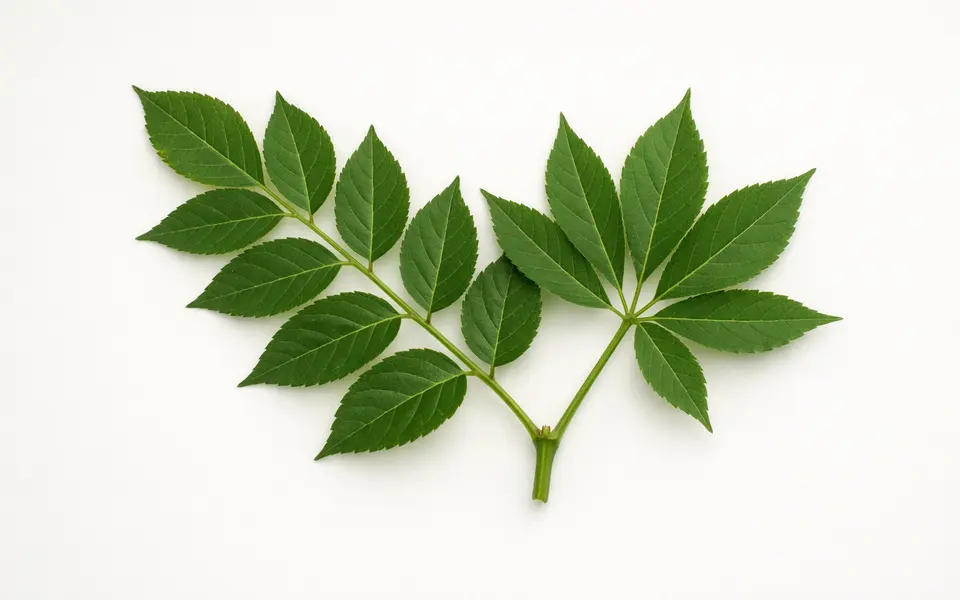
- Leaflet count and pattern (pinnate vs. palmate): primary discriminator that survives low-res photos.
- Rachis presence and petiolule vs. sessile leaflet attachment: shows whether the unit is truly compound.
- Leaflet outline and margin (serrate, entire, lobed): helps narrow genus groups.
- Venation pattern and midrib prominence: useful for matching species with similar shapes.
- Context cues (branch habit, bud position, nearby fruit/flowers): anchor the leaf clues to a plant’s life stage.
Weak signals
Some details look convincing in a single photo but are fragile under scrutiny. Color and surface sheen are among the weakest signals for compound leaves: lighting, time of day, wetness, and camera auto-adjustments can change perceived hues and gloss. Avoid using color alone to separate species unless you can show consistent color across multiple photographs and seasons.
Other weak signals include small-scale spotting, minor insect damage, and a single close-up angle. These features are often the result of temporary stress, pests, or the photo’s angle rather than species-specific characteristics. For instance, a serrated-looking edge in one angle might be a shadowed smooth margin in another; juvenile leaves sometimes have different shapes than mature leaves, which can mislead identification.
Finally, size without a reference scale and seasonal leaf condition are unreliable. A leaflet can look small or large depending on camera distance; include a ruler, coin, or finger for scale when possible. Never treat a single data point—like a single fruit or a single discolored leaflet—as proof of identity.
- Color and gloss: shifted by lighting and not species-proof.
- Single-angle close-ups: can hide attachment or rachis detail.
- Spots, holes, or temporary deformities: usually environmental or pest-driven.
- Apparent size without scale: misleading unless you include a reference.
- Juvenile vs. mature leaves and seasonal differences: shape can change as the plant grows.
Comparison workflow
Good comparisons use multiple clues in combination rather than one standout feature. Start by mapping what you see: count leaflets, note whether they attach to a central shaft or radiate from a single point, sketch or photograph the entire leaf with the connecting stem, and record habitat notes (tree, shrub, roadside, wetland). That log of observations turns a vague photo into a reproducible checklist.
Next, create a short ranked list of candidate groups using the strongest clues. If the leaf is pinnate with 7–13 leaflets and each leaflet is narrowly serrated, list walnut-type trees and certain legumes as top candidates. If the leaf is palmately compound with 5 large lobed leaflets, prioritize horse chestnut and related ornamentals. Use margin, venation, and petiolule presence to demote or promote contenders.
Then collect confirming clues: look for buds, leaflet attachment points, fruit, or bark texture in follow-up photos. Compare these against your candidate list; a match on two or three independent clues improves confidence far more than perfect color alone. If candidates still conflict, document the disagreement and treat any automated suggestion or single-match ID as provisional—use it to focus further observation rather than as the final answer.
- Record strong clues first: leaflet count, arrangement (pinnate/palmate), and rachis visibility.
- Make a short candidate list from structural matches, not color alone.
- Photograph confirming features: attachment point, buds, fruit, and branch habit.
- Rank matches by how many independent clues they share with your specimen.
- If uncertainty remains, note it and gather more photos or local references.
App workflow
After you run the clues above, use an identification app as a focused next step rather than a final judge. Open the app on your phone and upload several photos that represent the different clues you recorded: one wide shot showing the leaf on the branch, one close-up of leaflet attachment, and one image of any fruit or buds you found. Multiple images let the app weigh structural clues against color and texture.
Treat the app’s suggestions as ranked research leads. A top suggestion that matches two or three of your independent clues (leaflet arrangement, vein pattern, and petiolule presence) is useful; a top suggestion that only matches color or a single fragile feature should prompt more field checks. If the app name appears in the result, use it to find reference photos and authoritative species descriptions as follow-up reading.
If you want a consolidated checklist for follow-up photos and verification steps, the Plant Identification Cheat Sheet is a helpful internal resource you can consult for what to record next: https://leafidentification. app/blog/plant-identification-cheat-sheet. Remember that automated tools are powerful for narrowing possibilities quickly, but they are best used together with your own note-taking and additional photos to confirm a species.
Finally, keep uncertainty explicit in your notes. If the app returns a confidence score or multiple candidate names, write those into your field log and mark which clues support each candidate. That record makes it easier to verify the plant later with seasonal observations, local floras, or expert help rather than relying on a single app result.
Related guides
Use Leaf Identification: Leafzy after your clue checklist
After you record leaflet arrangement, attachment, and confirming features, open Leaf Identification: Leafzy on your phone and add several photos (wide shot, attachment close-up, and any fruit). Treat app results as ranked research leads: match suggestions to the structural clues you recorded, mark uncertain IDs as provisional, and collect follow-up photos if needed before concluding a species.

Frequently asked questions
How can I tell a compound leaf from a deeply lobed simple leaf?
Look for a clearly separate petiole and a rachis with leaflets attached versus a single blade with indentations. Compound leaves have repeated, separate leaflet units that often show their own tiny petiolules or a visible line where the leaflet connects. A deeply lobed simple leaf will show continuous lamina tissue across the sinuses, not distinct leaflet bases. Photograph the full leaf including the junction with the stem to capture this difference.
Why does leaflet count matter for identifying compound leaves?
Leaflet count narrows the candidate group immediately because many genera have a characteristic range—horse chestnut usually has 5–7 palmate leaflets, while ash typically has an odd-numbered pinnate set. Counting leaflets reduces large groups to a manageable shortlist and helps you prioritize other clues like margin type and venation when comparing species.
Can I identify a species from one photo of a compound leaf?
You can often narrow options to a small group from one good photo, but you should avoid claiming a definitive species from a single image. One photo is useful for creating a shortlist; use further photos of buds, fruit, bark, or habitat and cross-check with field guides or reliable sources before concluding a species identification.
What should I photograph to improve compound leaf identification?
Take a set: a wide shot showing the leaf on the branch, a close-up of the whole compound leaf including the rachis and petiole, a close-up of leaflet attachment and margin, and images of any fruit, flowers, or buds nearby. Include a scale reference like a coin or ruler and note the habitat (shoreline, open field, forest edge). These multiple angles help both human observers and apps evaluate structural clues reliably.