Opposite vs Alternate Leaves: Arrangement Clues for Plants
Learn which opposite vs alternate leaves details a photo can prove, which it cannot, and the follow-up checks worth doing before you rely on the answer.
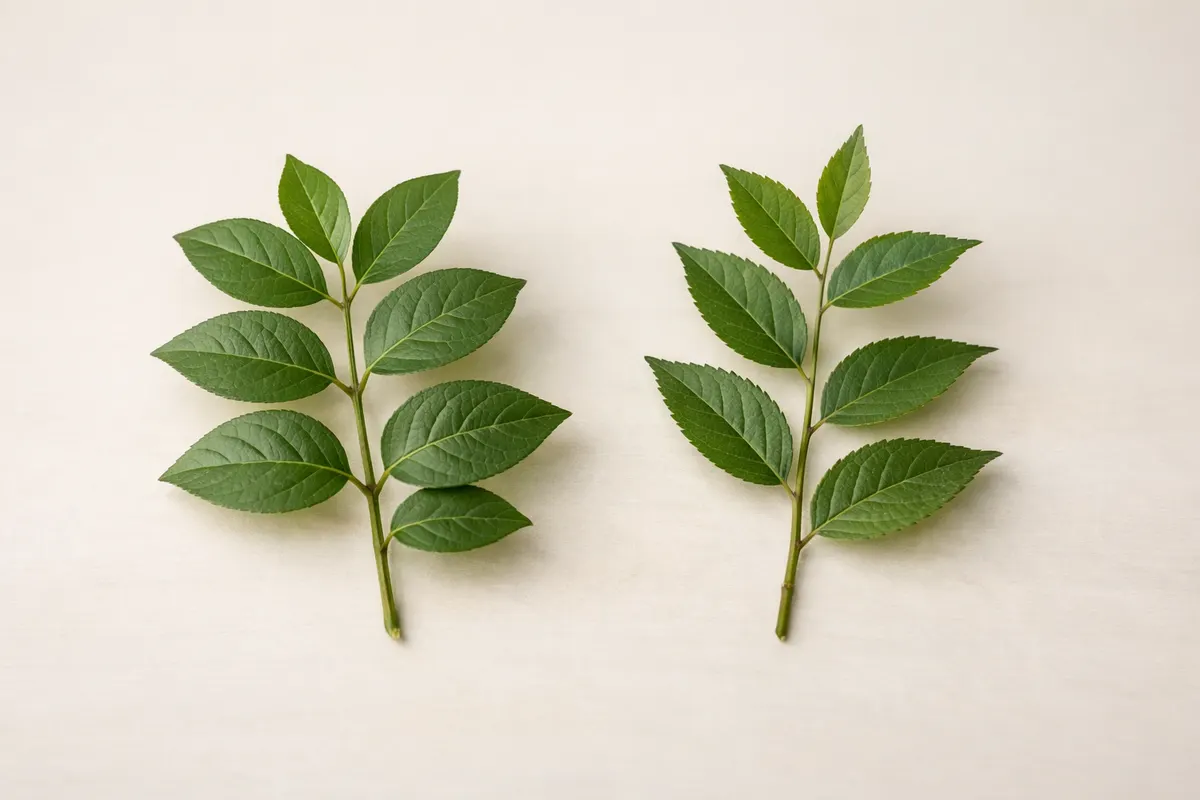
Opposite vs alternate leaves: the quick practical difference
Opposite vs alternate leaves is an arrangement clue you can usually confirm from a clear twig photo: opposite leaves form matched pairs at the same node, directly across from each other; alternate leaves are single per node and appear staggered up the stem. That single visual rule is the core difference to check first when you’re identifying a plant from a picture.
A fast field check starts with a short stretch of stem showing several nodes. If you consistently see two leaves emerging at the same level on opposite sides of the stem, the plant is opposite. If you see one leaf per node with each leaf slightly higher than the previous one on alternating sides, it’s alternate.
Use leaf-bearing nodes where the petiole (leaf stalk) connects to the stem as the decisive spot, not individual leaflets or clusters. Compound leaves and leaflets attach to a central rachis and can look like opposite pairs unless you find the stem/node connection point.
Common tree and shrub examples help anchor the pattern in your mind: maples, dogwoods, and lilacs are familiar opposite-planted species; many oaks, willows, and cherries show alternate arrangement. Keep these examples as quick memory aids, but verify before making a positive ID.
If a stem shows three or more leaves at the same level, that’s a whorled arrangement and a different category. When nodes are spaced widely or leaves are clustered at branch tips, the arrangement can look ambiguous—follow the verification steps below before deciding.
- Check at least three consecutive nodes on a twig before concluding the arrangement.
- Identify where the leaf petiole meets the stem — that junction marks the node.
- Treat compound leaves and leaflets separately: find the true node at the base of the whole leaf.
- If nodes show 2 leaves at the same level → opposite. One leaf per node in a spiral or zigzag → alternate.
Side-by-side clues: opposite vs alternate leaves
This table compresses the most useful visual clues, typical confidence, and practical next steps when you spot opposite or alternate leaves in a photo. Use it as a short checklist when you only have one or two images: confirm more nodes, check buds, and look for compound-leaf confusion if a result would change a safety or purchase decision.
If the first read looks strongly opposite or alternate, add a contextual check: bark, buds, and the arrangement of branches near the stem. When photos don’t show nodes clearly, confidence falls and verification becomes essential.
| Feature | Opposite leaves | Alternate leaves | Typical examples |
|---|---|---|---|
| Node pairing | Two leaves at the same level, mirrored across stem | One leaf per node; nodes staggered along the stem | Opposite: maples, dogwoods, lilacs; Alternate: oaks, willows, cherries |
| Buds and petiole position | Bud sits between the two petioles or behind paired leaves | Bud at the base of the single leaf petiole; appears between leaf and stem | Opposite buds often visible behind each pair; alternate buds alternate sides |
| Twig appearance | Pairs line up across the stem, often creating a flat plane | Leaves spiral or zigzag, producing a staggered look | Opposite species can create symmetrical branch patterns; alternates less regular |
| Compound-leaf trap | Whole leaves may be opposite even if leaflets pair along a rachis | Leaflets along a rachis can look like alternate leaves unless node is found | Confirm whether the structure is a leaflet or a true leaf |
- Treat the table as a first-pass evaluation; follow verification steps if you need higher confidence.
- Don’t let common examples substitute for direct node evidence — examples should prompt, not replace, the node check.
When opposite or alternate leaf ID matters
Leaf arrangement becomes a priority at different stages of plant ID. Use arrangement early when you need to narrow large groups (for example, separating maples and dogwoods from oaks and willows), or when a small set of genera is under consideration. It’s a strong early filter because arrangement is fairly stable for many lineages and often visible even if the leaf shape is damaged.
Alternate arrangement is especially useful if you’re already looking at small-leaved trees or shrubs where other diagnostic characters aren’t obvious. Opposite arrangement is a quick discriminator for several ornamental and native shrubs; spotting it early can reduce the number of candidate species dramatically.
Avoid relying on arrangement alone when the consequence of error is high: commercial purchasing, foraging, or managing invasive species. In those cases treat arrangement as one useful trait among many — follow up with additional clues (margin, venation, bud position, flowers or fruits) before acting.
Practical field examples: a backyard shrub with paired leaves and opposite buds can often be narrowed to a handful of genera at the park or garden center. If you’re documenting a woody stem that shows inconsistent pairings, pause and collect photos showing more nodes; mixed signals often come from branchlets, damaged nodes, or compound-leaf misreads.
- Prioritize arrangement when sorting at the genus level or eliminating large groups of similar-looking species.
- Defer final identification where safety, legality, or cost is at stake until multiple traits confirm the arrangement.
- Use opposite/alternate as a gateway trait: it narrows your path to the next diagnostic checks (buds, flowers, leaf margins).
Why opposite and alternate leaves get mistaken
Several common visual traps can turn a clear node pattern into a confusing photo. The biggest is mistaking leaflets for leaves: pinnate or bipinnate compound leaves attach multiple leaflets to a single petiole (rachis), so a photograph of leaflets along a rachis may look like alternate leaves unless you find the stem node where the whole leaf attaches.
Leaf clustering and branch tips cause another common error. When leaves are bunched near the twig tip, nodes are compressed and it’s easy to assume an opposite pairing where none exists. Likewise, seasonal growth can push leaves into tight clusters (e.g., flush of new growth in spring) so photograph a section of older stem instead of only soft tips.
Petiole twist and leaf angle can create an illusion of opposite pairs. A long petiole that bends can place a leaf across from another in the same horizontal plane even though they originate at different nodes. Look along the stem axis, not just from one side, to confirm the node level.
Whorled leaves (three or more at a node) and subopposite stems (pairs that are slightly offset) are intermediate cases that confuse readers. Whorled species are less common but easily identified once you know to look for three-or-more leaves at exactly the same level. Subopposite stems require inspecting more nodes to decide whether the pattern is truly paired or slightly staggered.
- Find the true node by locating the bud or the scar at the base of the petiole before labeling arrangement.
- Photograph the stem from multiple angles — a side-on image and one aligned with the stem axis helps avoid petiole-twist illusions.
- Check for compound leaves: trace a presumed leaf back to its attachment point on the woody stem to see if it’s a leaflet or a whole leaf.
Verify leaf arrangement before you decide
If the arrangement will influence an important decision, follow a short verification path that increases confidence without needing expert-level microscopy. Step 1: photograph a 6–12 inch section of stem that shows at least three sequential nodes, include a ruler or coin for scale, and capture the stem axis from one side and from above so you can see whether pairs are truly at the same level.
Step 2: locate markers of the node — the bud, leaf scar, or where the petiole meets the stem. Note whether buds sit between two petioles (typical for opposite) or appear behind single petioles (typical for alternate). If leaves are compound, identify the petiole of the whole leaf and find the node on the woody stem where that petiole attaches.
Step 3: expand the trait checklist. Record leaf margin (entire, serrated, lobed), venation (parallel, pinnate, palmate), and presence of stipules or hairs. These secondary traits reduce risk when leaf arrangement alone is ambiguous. If you can, photograph flowers or fruit — reproductive parts often confirm genus and remove doubt about arrangement.
Step 4: consult a trusted reference and log your uncertainty. For quick classroom or hobby use, compare against field guides or a summary like the Plant Identification Cheat Sheet, which compiles common visual clues and lookalikes. For faster first-pass support, use the Leaf Identification: Leafzy app to scan your photos and treat the results as a research lead rather than a final answer.
- Photo checklist: show 3+ nodes, include scale, get multiple angles, show buds and the petiole base.
- Node check: find the bud or leaf scar — that anchors whether a structure is a leaflet or a leaf.
- Secondary traits: margin, venation, flowers/fruit increase confidence; use them before acting on the ID.
Related guides
Use Leaf Identification: Leafzy as a careful next step
After you check nodes, buds, and the other visible clues above, use Leaf Identification: Leafzy to scan your photos as a researched next step. Treat the app’s suggestions as leads: compare them with the node evidence and secondary traits you recorded. If the arrangement is unclear, add stem photos showing more nodes, include flowers or fruit when possible, and keep your identification notes as part of the plant’s research record.

Frequently asked questions
How do I tell compound leaflets from opposite leaves in a photo?
Trace the structure back to where it meets the main woody stem. If many narrow segments join a central rachis and that rachis alone connects at a single node, those are leaflets of one compound leaf. If you find two distinct petioles meeting the stem at the same level, those are opposite whole leaves. Photograph the junction and any bud or leaf scar to confirm.
Can leaf arrangement change on the same plant?
Most species maintain a consistent arrangement (opposite, alternate, or whorled) throughout their stems, though juvenile shoots can sometimes appear different. Apparent changes usually come from damaged nodes, clustered new growth, or confusion between leaf and leaflet. Always check multiple nodes and different-aged stems before concluding the arrangement.
What if I only have a single photo of a leaf — can I still decide arrangement?
A single isolated leaf rarely proves arrangement because the node and bud are the decisive evidence. If the image includes the petiole base and a small section of stem showing the node, you may be able to tell. Otherwise treat arrangement as unknown and gather one or two additional photos showing the node sequence before relying on the result.
Are there visual shortcuts to remember for opposite vs alternate leaves?
Yes. Shortcuts include: opposite leaves appear as mirrored pairs across the stem; alternate leaves form a zigzag or spiral with one leaf per node; and whorled leaves present three or more at a single node. Use those heuristics as quick filters, but verify nodes and check for compound-leaf traps before final ID.